Uni Timetable Manager
Tutorial 1: The Basics
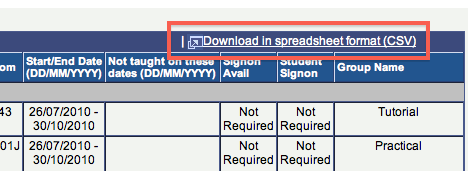
Log into SI-net, go to the Timetable section and click on Classes List View, not Classes Weekly View. Look for a link to Download in spreadsheet format in the top right corner. Save the ps.xls file somewhere you can find it, name it whatever you like.
Run the software and click Import on the toolbar, or Timetable > Import from the menu. Select the file you obtained from SI-net, then click Next. If you encounter an error at this stage, make sure you used the Classes List View. If that wasn't the problem, you've probably found a bug. Send me an email!
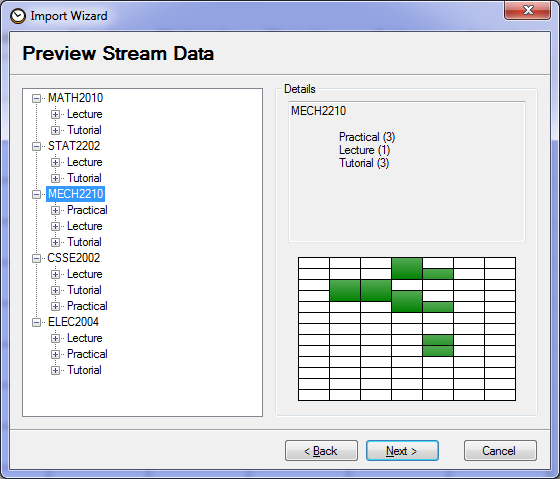
The next dialog presents you with a visual preview of the classes for each subject.
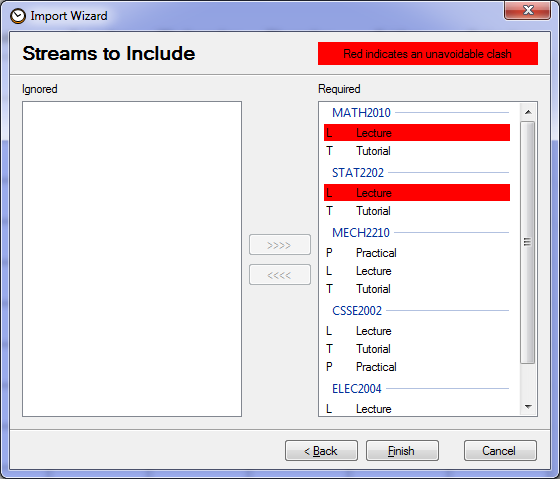
The final dialog gives you a chance to review which classes are ignored and included by the optimiser. By default, it ignores classes with prefix C (contact), W (workshop) or S (seminar). Beware that sometimes a subject requires that you sign on for one of these.
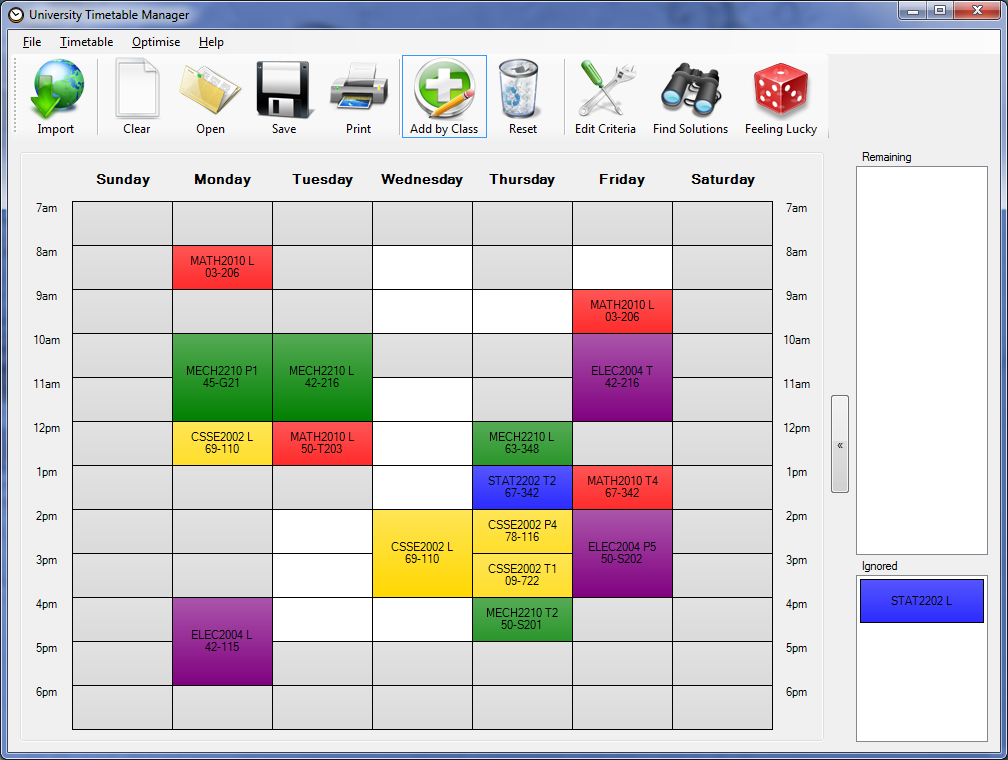
This dialog will also tell you if there is an unavoidable clash in your timetable. In the example shown below, MATH2010 and STAT2202 lectures are taught at the same time in the first and second half of the semester. I'll ignore the STAT2202 Lecture for now, otherwise the optimiser will not be able to find any solutions. Eventually I'm hoping to use the Dates Taught On data from SI-net to get around this, but don't hold your breath. Sorry!
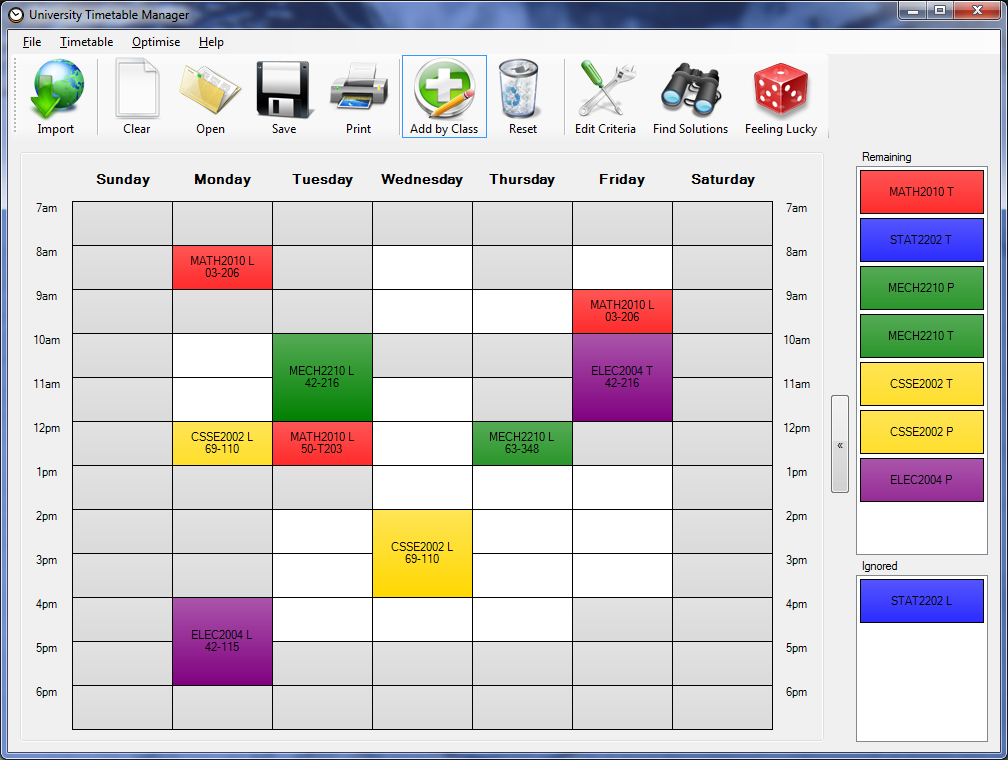
After finishing the import wizard, you should see your default timetable. The program has automatically added the classes which you must take. You can return to this state at any time using the Reset button in the toolbar. Times when you have no classes at all are shaded grey.
Click on the Find Solutions icon. You might have to wait a little while for the optimiser to run, especially if you have a couple of subjects which have lots of tutorial options available at different times, for example. After the optimisation has completed, you'll see a list of solutions, ordered from "best" to "worst". The criteria can be modified, but we'll leave this for a later tutorial. Solutions that have the same properties are highlighted in alternating white and grey.
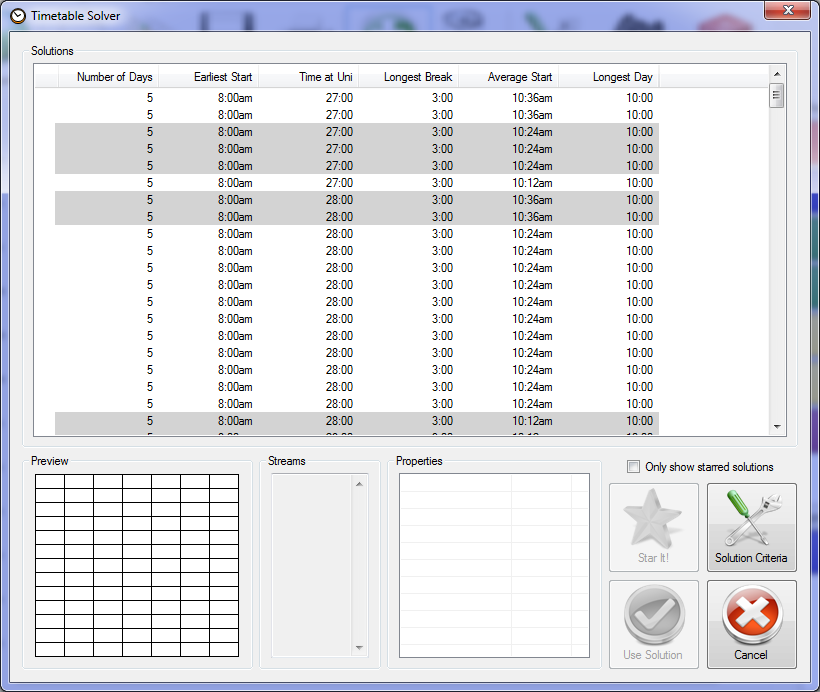
When you select a solution, information is displayed at the bottom of the window, along with a visual preview. You can "star" a handful of solutions then check Only show starred solutions.
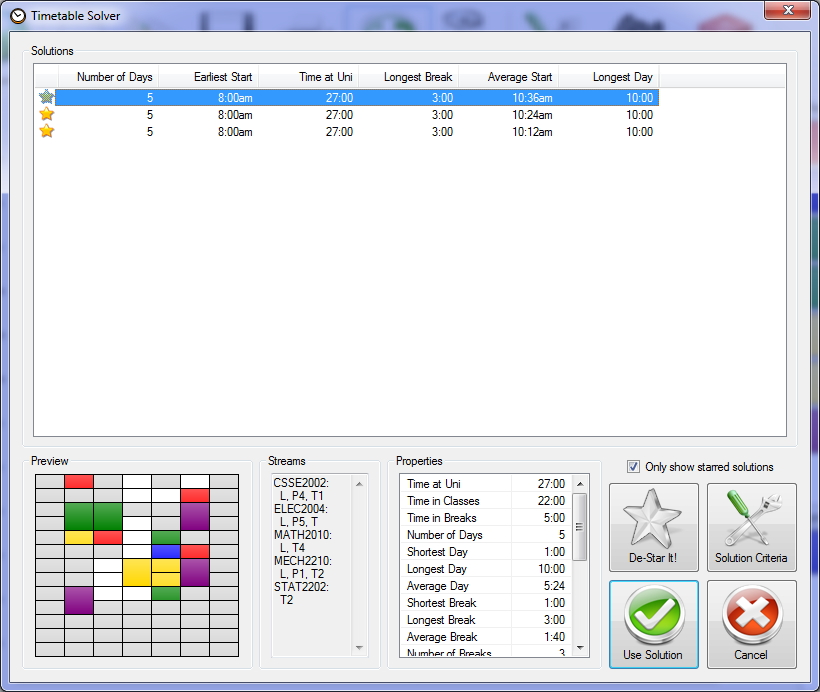
Once you've selected a solution you like, click Use Solution or hit Enter. And that's it!
Too easy? Let's move on to the next tutorial.